Netplayseeker - Getting Started
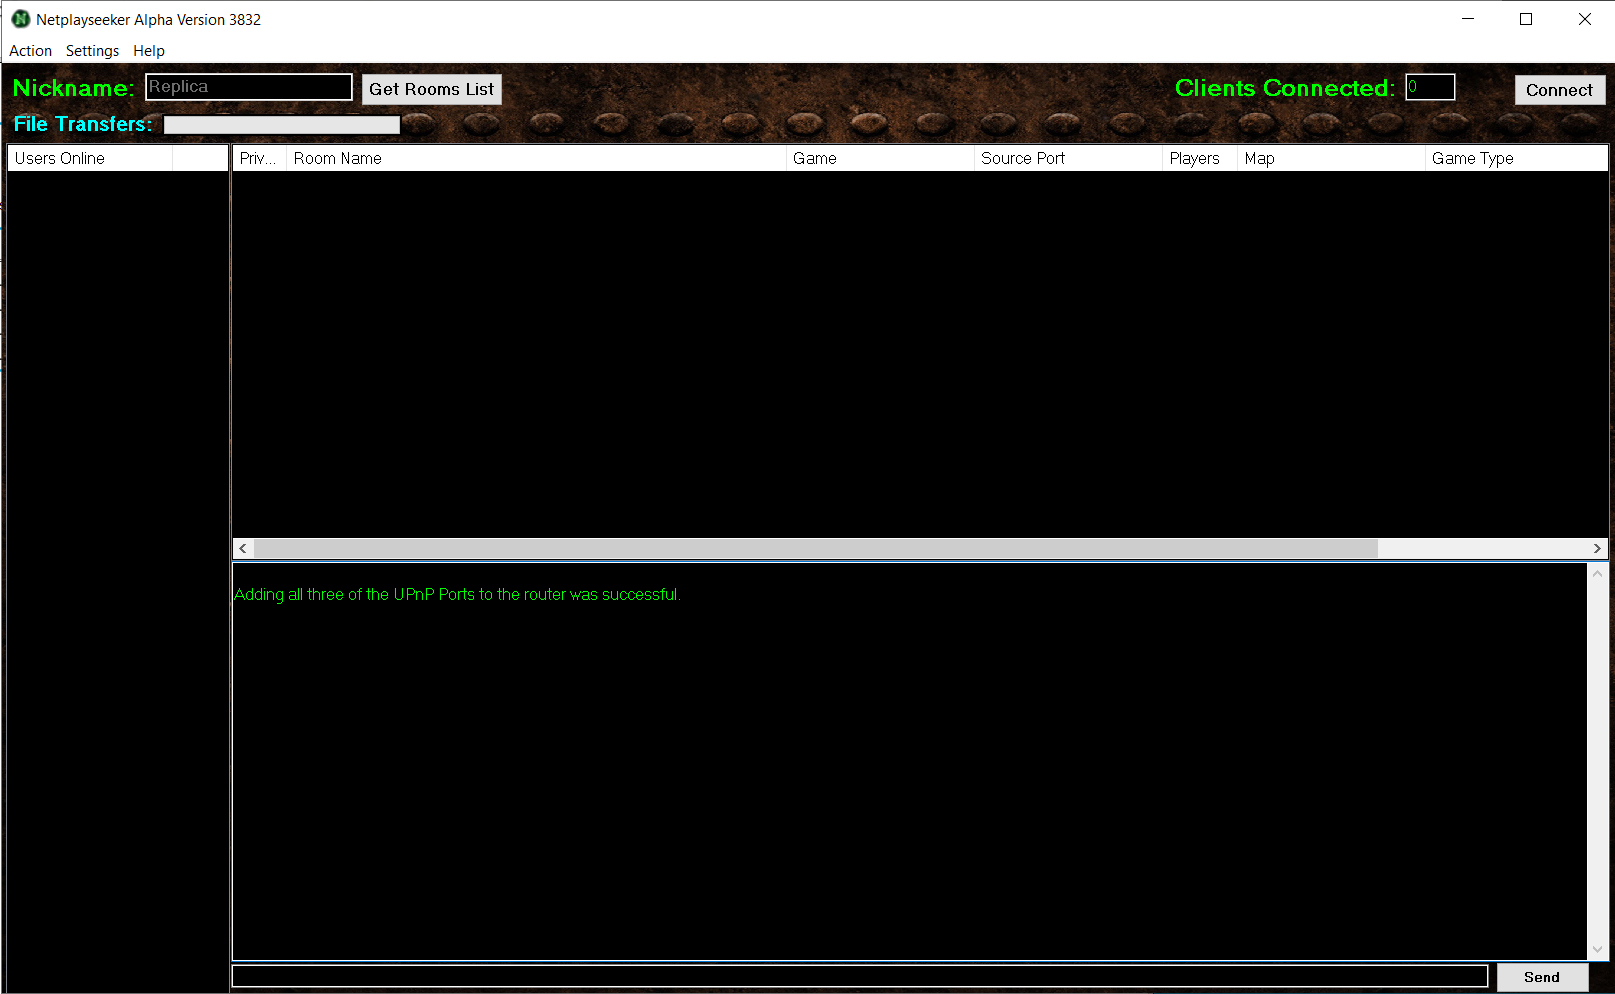
If you get the message saying "Adding all three of the UPnP Ports to the router was successful" then you won't have to worry about forwarding your ports manually on your router (Make sure any firewalls also are not blocking the ports).
The default ports can be seen by navigating into the menus by going into the "Settings Menu" and then into "Multiplayer and Networking".
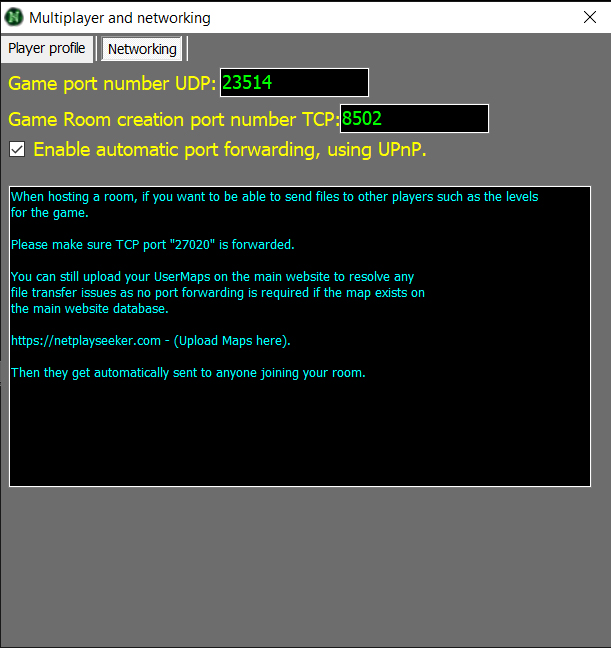
By default UPnP is enabled to automatically try to forward the ports on your router for you without hassle if the UPnP is enabled on your router.
The default ports can be changed but the defaults are currently UDP (23513) which is used for the game Source Ports to connect players together.
Games using (Master/Slave) mode or (Server/Client) mode only require one player to do this the HOST usually the first player or a Dedicated Server being hosted.
But if the game is (Peer-2-Peer) mode it's most of the times required for all players to have this port forwarded on their router in order to connect to one another.
The other default port is TCP (8501) which is only used for players that want to host a room, so only this port needs to be forwarded if you want to host rooms on Netplayseeker and it's not required to join rooms.
The default port TCP (27020) is used to send User Maps to other players that join your room if they could not get the map from the Netplayseeker website.
At first when a player trys to join your room, if they don't have the level for the game you are playing on for example (karnage3p.map) when trying to join your room, what will happen is Netplayseeker will try to download the missing map file to your UserMaps location folder/directory while it trys to fetch it from (https://netplayseeker.com/content/uploaded_files/karnage3p.map) if it exists Windows 7 and above supports this.
If it failed for some reason then the player will still join the room being hosted, but it will try to connect to the host of the rooms TCP Port (27020) to transfer the map file level for the game which works on Windows XP and above.
Players can upload levels for the game if missing on the website located at: https://netplayseeker.com/content/ for Duke levels or use the main website to upload it for other games.
Do note that it is case sensitive for the filenames in order to work.
Setting Up Your Player Profile
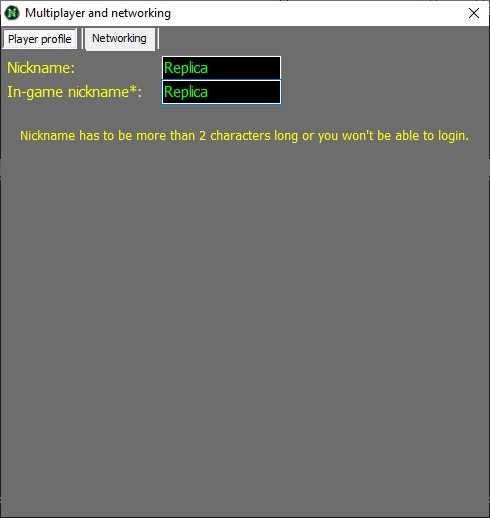
Then in the same "Settings Menu" and then into "Multiplayer and Networking" choose the tab called "Player Profile" and change your Nickname and also the In-game nickname.
The Nickname is your name displayed on Netplayseeker and your In-game one is the one displayed inside the games you play after launching them.
Setting Up A Game
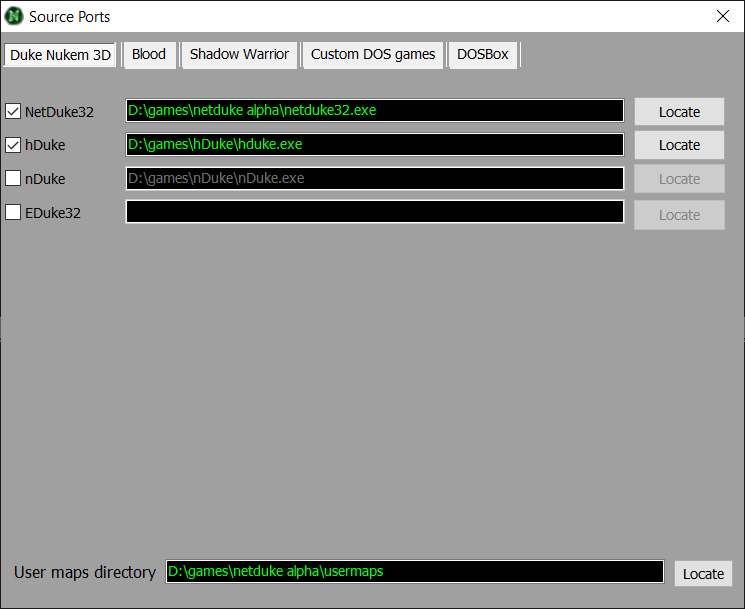
From here you can choose which games you want to add and their locations to them.
Once you have set up them and chosen the correct paths to them as well as your User Maps directory path were the levels should be downloaded to and kept, you should be about ready to join and host rooms on Netplayseeker.
The last thing you would do is click on the (Connect) button to connect online to the main Netplayseeker Lobby.